My Store
Premium Lightroom Preset | Old Vintage Film
Premium Lightroom Preset | Old Vintage Film
Couldn't load pickup availability
Old Vintage Film
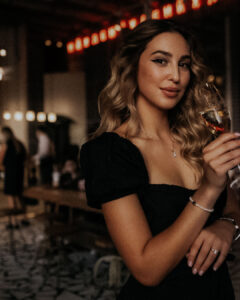
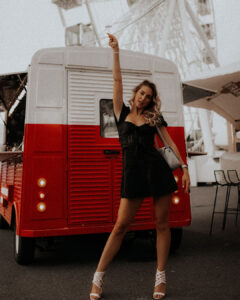
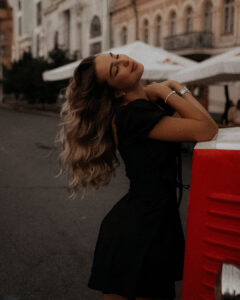
I designed this preset for Aesthetic photography, Indoor photography, Beautiful Girl and Portrait photography, Art photography, Antique photography.
Mobile Presets, ideal for bloggers and influencers seeking that luxurious old money aesthetic. Transform your portraits with our carefully crafted Blogger Presets designed to give your photos a golden, creamy glow perfect for summer vibes. Our Photo Editing Presets are not limited to Lightroom - they also work seamlessly with Premiere Pro for a professional touch. Indulge in the beauty of our Luxury Presets, guaranteed to enhance your images with a touch of elegance. Upgrade your editing game with our Influencer Presets and watch your photos exude sophistication and charm. Elevate your portraits to a new level of artistry with our Golden Presets, capturing the essence of sumptuous luxury in every click.
FAQ
1. This preset made my photo too bright. How to Adjust it?
Apply the following settings in your Mobile Lightroom App:
- Light > Exposure > Decrease
- Light > Shadows > Decrease
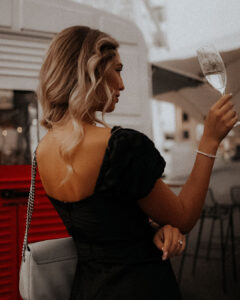 2. The preset made my photo too dark. How to Adjust it?
Apply the following settings in your Mobile Lightroom App:
- Light > Exposure > Increase
- Light > Shadows > Increase
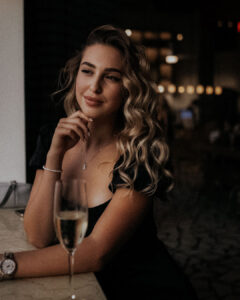 3. The preset made my photo too warm/cold. How to adjust it?
Apply the following settings in your Mobile Lightroom App:
- Color > Temp > Increase/Decrease (Tip: More Yellow for warmer tones, More Blue for colder tones)
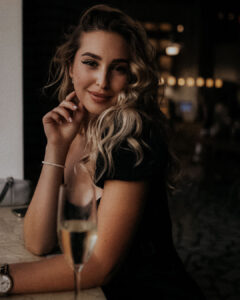 4. The preset made my skin tone too orange. How to adjust it?
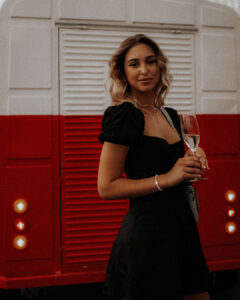 Apply the following settings in your Mobile Lightroom App:
- Color > Mix > Orange > Saturation > Decrease
- Color > Mix > Orange > Luminance > Increase
 5. The preset made my skin tone too Red How to adjust it?
Apply the following settings in your Mobile Lightroom App:
- Color > Mix > Red > Saturation > Decrease
- Color > Mix > Red > Luminance > Increase
 6. The preset made the greens in my photo too faded and did not look good. How do I adjust it?
Apply the following settings in your Mobile Lightroom App:
- Color > Mix > Green > Saturation > Increase
- Color > Mix > Green > Luminance > Increase/Decrease
 How to Install:
1. Download the DNG file from my Post.
2. And then open your LR App and Import the DNG file into your Lightroom mobile app as you Import any image.
3. Open the DNG image, tap on the 3 dots icon on the upper right corner and choose Copy and then open your own picture and Paste to your photo, or choose to Create Preset (this option is also present there), to save the presets in your Presets lightroom Gallery.
How to use ✨
✅ Step 1 Download Lightroom Mobile
✅ Step 2 Download the preset files
✅ Step 3 Open Lightroom mobile and create a new album. Tap the album to open it, then tap the "+" icon to add a new photo.
Choose one of the DNG preset files you downloaded.
✅ Step 4 At the bottom, find and tap the "Presets" icon (often represented by three circles).
You'll see a list of available presets. Tap the one you want to use.
Lightroom will automatically apply it to your photo.
✅ Step 5 When you're satisfied with the edit, tap the checkmark or "Done" button to save your edited photo.
❤️ Advantages you get from using my Lightroom mobile presets ❤️
▪️ Professional Results: These presets are often created by experienced photographers and designers, ensuring high-quality and polished edits.
▪️ Time-Saving: The efficiency of presets means you can edit large batches of photos in a fraction of the time it would take for manual editing.
▪️ Variety: With a collection of presets, you have the flexibility to experiment with different styles and moods for your photos.
Thank you for choosing me ❤️
Share


